

Embarking on a whole-home renovation is both thrilling and intensely overwhelming. It is an incredible opportunity to take an aging, outdated property and completely transform it into a highly personalized sanctuary that perfectly aligns with your aesthetic tastes and daily functional needs. There is a profound sense of satisfaction in tearing down restrictive walls, reimagining cramped floor plans, and watching a dilapidated space breathe new life. However, beneath the glossy “after” photos seen in magazines and television shows lies a reality of dust, delays, and critical decision-making.
The sheer volume of moving parts in a complete home renovation is staggering. You are not just painting walls; you are tearing down load-bearing structures, rerouting complex electrical grids, upgrading plumbing lines, and exposing the very bones of the house to the elements. This complexity means that hiring the wrong people—or executing tasks entirely out of order—can rapidly turn a dream project into a stressful, budget-draining nightmare.
This guide is designed to cut through the confusion of the construction industry by breaking down exactly who you need to hire and at what specific stage of the process they should be brought in. A successful renovation relies entirely on sequence and specialization. By strategically assembling a team of highly vetted experts and managing the sequence of their work, you can ensure your complete home renovation is executed safely, on budget, and to the absolute highest quality standards.

Phase 1: Structuring the Project and Securing the Envelope
The initial phase of a whole-home renovation rarely involves the glamorous selections of tile or cabinetry. Instead, it is rooted in establishing a solid management framework and ensuring the physical structure of your house is protected from the elements. If you fail to secure the envelope, every dollar you spend on the interior is at risk.
Appoint a Central Point of Contact to Manage the Chaos
Taking on a whole-house renovation as a DIY project manager is a monumental risk unless you have decades of construction industry experience. You will be dealing with municipal zoning boards, inspectors, material suppliers, and dozens of different tradespeople. Managing these schedules while ensuring that the framing does not interfere with the HVAC ductwork, or that the plumbing is laid before the subfloor goes down, requires a master conductor.
For a project of this scale, bringing in experienced general contractors is absolutely essential. These professionals are the umbrella management over your entire site. They are responsible for pulling the overarching building permits, scheduling the specialized trades in the correct and most efficient sequence, and holding the line on your budget. They also carry the necessary massive liability and worker’s compensation insurance policies that protect you, the homeowner, from devastating lawsuits if someone is injured on your property.
When vetting the person or team who will run your site, consider the following actionable steps:
-
Verify Subcontractor Networks: Ask about the tradespeople they employ. A great project manager is only as good as the plumbers, electricians, and framers they bring to the job.
-
Understand the Contract Structure: Determine if you are signing a “Fixed Price” contract (which protects you from budget overruns but limits flexibility) or a “Cost Plus” contract (which offers flexibility but requires strict auditing of receipts).
-
Establish Communication Protocols: Demand a weekly site walk-through and a transparent digital dashboard where you can see schedule updates, daily logs, and budget tracking.
-
Check the License Validity: Never assume a license is current. Look up their license number on your state’s contractor board website to check for formal complaints or lapsed bonding.
Prioritize Weatherproofing Before Touching the Interior
It is a common mistake for eager homeowners to start tearing out their kitchens or bathrooms on day one. However, if the roof above those newly renovated spaces is failing, one heavy rainstorm can destroy thousands of dollars worth of fresh drywall, custom cabinetry, and hardwood flooring. The absolute first physical step in a full home renovation is securing the building envelope.
You must assess the structural integrity of the top of your house before any interior walls are opened. Finding a reputable local roofing contractor to evaluate your property is critical. They understand the specific weather challenges of your region—whether that involves high-velocity hurricane winds, heavy snow loads, or blistering sun—and can recommend the appropriate underlayments and shingle ratings. Securing the envelope means that the rest of the renovation can proceed without the looming threat of water intrusion.
To ensure your weatherproofing is handled correctly, adhere to these guidelines:
-
Demand a Full Tear-Off: Never allow new shingles to be layered over old ones. A full tear-off is the only way to inspect the underlying wood decking for hidden water damage, mold, and rot.
-
Upgrade the Underlayment: Ask for a synthetic, tear-resistant underlayment rather than traditional felt paper, as it provides a far superior barrier against moisture.
-
Install Ice and Water Shields: Ensure that an ice and water barrier is applied to the eaves, valleys, and around all penetrations (like chimneys and vent pipes) to prevent leaks during freeze-thaw cycles.
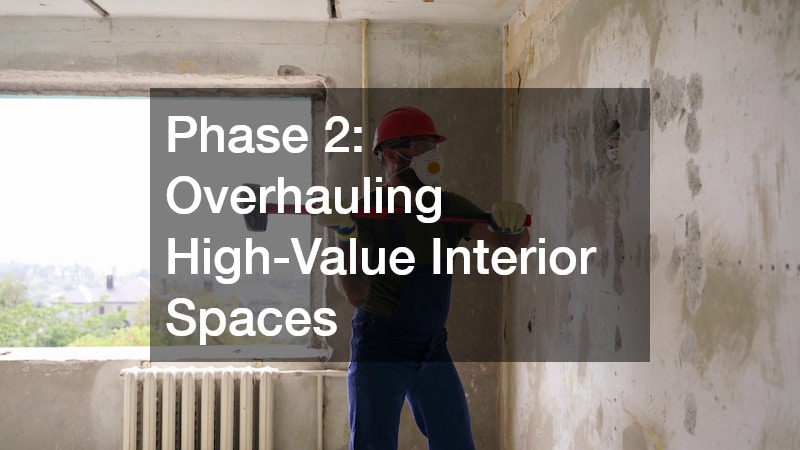
Phase 2: Overhauling High-Value Interior Spaces
With the project management secured and the exterior envelope locked down, the renovation moves into the most complex, expensive, and valuable rooms in the house: the kitchen and the bathrooms. These spaces require an intense convergence of plumbing, electrical, and custom carpentry.
Optimize Your Cooking Layout for Workflow and Storage
The kitchen is the heart of the home, but it is also a highly technical workspace. A poorly designed kitchen will frustrate you daily, regardless of how beautiful the finishes are. When completely gutting a kitchen, you are not just replacing cabinets; you are likely moving walls to create open-concept living, running new gas lines for professional-grade ranges, and upgrading the electrical panel to handle modern appliances.
Because the tolerances in a kitchen are incredibly tight—appliances must fit exactly, countertops must be perfectly level, and plumbing rough-ins must align precisely with sink bases—you need specialized oversight. Hiring a dedicated kitchen remodeling contractor ensures that the architectural design translates flawlessly into physical reality. These experts know how to optimize cabinet layouts for maximum storage, maneuver around load-bearing constraints, and coordinate the precise timing required between cabinet installation, countertop templating, and final plumbing hookups.
To maximize the functionality and value of your new cooking space, keep these tips in mind:
-
Implement the Work Triangle: Ensure the path between your stove, sink, and refrigerator is unobstructed and forms an efficient triangle to minimize unnecessary steps while cooking.
-
Plan for Heavy Electrical Loads: Modern kitchens require dedicated circuits for the refrigerator, microwave, dishwasher, and garbage disposal, plus multiple 20-amp circuits for countertop appliances.
-
Maximize Lower Storage: Opt for deep drawers instead of traditional lower cabinets with doors. Drawers allow you to see and access all your pots and pans without kneeling and digging through dark shelves.
-
Focus on Task Lighting: Do not rely solely on recessed ceiling cans. Incorporate under-cabinet LED lighting to illuminate your countertops and eliminate shadows over your prep areas.
Upgrade Plumbing Behind the Walls to Prevent Future Leaks
Bathrooms are essentially indoor water management systems. They are subjected to daily deluges of water, high humidity, and extreme temperature fluctuations. If the systems behind the drywall and beneath the tile fail, the resulting water damage can quietly rot the structural joists of your home over several years before you even notice a problem.
When you have stripped a bathroom down to the studs, it is the perfect time to upgrade outdated plumbing. Old galvanized steel pipes will eventually corrode and restrict water pressure, while polybutylene pipes are notorious for sudden, catastrophic ruptures. Bringing in seasoned bathroom contractors is the best way to ensure that the hidden infrastructure is modernized and that the wet areas are built with bulletproof waterproofing technology. They will handle the complex slope of custom shower pans and the installation of vapor barriers that keep mold completely out of your wall cavities.
Before closing up the walls in your new bathrooms, mandate the following steps:
-
Replace Old Supply Lines: Upgrade all hidden water supply lines to modern PEX or rigid copper to future-proof the home against leaks and ensure strong, consistent water pressure.
-
Utilize Modern Waterproofing Membranes: Do not rely on traditional drywall or cement board alone in wet areas. Insist on topical waterproofing systems (like Schluter-Kerdi or RedGard) painted or applied directly over the backer board before any tile is laid.
-
Upgrade the Ventilation: Proper exhaust fans are non-negotiable. Ensure the fan is properly sized for the room’s square footage and is vented entirely to the outside of the roof—never directly into the attic, which will cause massive mold growth.

Phase 3: Upgrading Core Systems and Finalizing the Capstone
As the interior framing and rough-ins are completed, the focus shifts to the invisible systems that dictate the daily comfort of your home, as well as the meticulous execution of the home’s exterior capstone.
Size Your Climate Systems Properly to Avoid Energy Waste
A beautiful home is unlivable if it is freezing in the winter, stifling in the summer, or plagued by poor indoor air quality. During a complete renovation, especially if you have added square footage or removed walls, your existing climate control systems are likely obsolete. You cannot simply attach new ductwork to an old furnace and expect adequate performance.
Climate control is a highly regulated science. You need a licensed heating and air conditioning contractor to evaluate the new thermal envelope of your home. They will run complex calculations to determine the exact amount of heating and cooling your specific layout requires. Oversizing a system will cause it to short-cycle, leaving the house incredibly humid, while undersizing it will cause the equipment to run continuously, driving up your energy bills and wearing out the machinery prematurely.
To guarantee year-round comfort and energy efficiency, focus on these critical HVAC elements:
-
Demand a Manual J Calculation: Never let a professional guess the size of the equipment based on a “rule of thumb” square footage estimate. A Manual J calculation factors in the direction your windows face, the quality of your insulation, and your local climate.
-
Seal the Ductwork: Leaky ducts can lose up to 30% of their conditioned air into uninsulated crawlspaces or attics. Ensure all new and accessible old ductwork is sealed with mastic sealant, not standard duct tape.
-
Consider High-Efficiency Heat Pumps: If you are overhauling the system, look into modern variable-speed heat pumps. They are incredibly energy-efficient and can handle both the heating and cooling loads for the home, often eliminating the need for fossil fuels.
-
Establish Zoned Climate Control: Instead of relying on one thermostat to dictate the temperature of the entire house, install a zoned system with electronic dampers to independently control the climate in the bedrooms versus the main living areas.
Verify Flashing and Ventilation Standards During Top-Level Upgrades
While the earlier phase addressed the structural necessity of securing the roof deck and underlayment, the actual installation of the top-level materials requires exceptional attention to detail. The shingles, metal panels, or tiles are your home’s primary armor against the sky, but the system is only as strong as its weakest seam.
The majority of roof leaks do not occur in the middle of a field of shingles; they occur at the penetrations and the edges. Communicating closely with skilled roof installers during the physical application phase guarantees that critical details are executed flawlessly. If flashing is installed backward or ventilation is choked off, it can void the manufacturer’s warranty on the materials, leaving you financially responsible for the inevitable repairs.
To ensure the top of your home performs perfectly for decades, verify these installation standards:
-
Inspect the Step Flashing: Anywhere the roof intersects with a vertical wall (like a dormer or a chimney), individual pieces of L-shaped metal step flashing must be woven into each course of shingles to aggressively direct water away from the wall.
-
Ensure Unblocked Soffits: The intake vents under your eaves (soffits) must remain clear. Make sure interior insulation baffles are installed so that attic insulation does not spill over and block the airflow.
-
Balance Intake and Exhaust: A roof needs to breathe to prevent shingle-baking heat in the summer and condensation-driven rot in the winter. Ensure the net free area of your ridge vents matches the capacity of your soffit vents to create a continuous, passive draft of air under the roof deck.

Phase 4: Expanding the Footprint with Outdoor Living Spaces
With the interior of the home reaching its final stages of finishing, a true complete renovation extends past the back door. Expanding the livable square footage into the backyard fundamentally changes how you interact with your property, turning basic yards into high-end entertainment zones.
Anchor Exterior Structures to Frost-Depth Footings
Outdoor carpentry faces a completely different set of challenges than interior framing. A backyard entertaining space is constantly subjected to UV radiation, torrential rain, and extreme weight loads from outdoor kitchens, hot tubs, and large gatherings of people. Furthermore, if an outdoor structure is attached directly to your home, any structural failure outside can rip the siding and framing off your house.
Building a safe, code-compliant outdoor living area is not a weekend DIY job. Hiring experienced deck contractors is necessary to navigate the strict municipal codes regarding outdoor structures. They understand the heavy-duty fastening systems required to build a frame that will not sway or collapse, and they can guide you through the overwhelming myriad of material choices, from traditional pressure-treated lumber to ultra-low-maintenance PVC and composites.
To ensure your outdoor structure is safe and enduring, insist on the following structural protocols:
-
Dig Below the Frost Line: All concrete footings supporting the posts must be poured below your region’s specific frost line. If they are too shallow, the freezing and expanding ground will heave the posts upward, destroying the structure.
-
Use Proper Ledger Board Fasteners: The ledger board (the piece of wood attaching the structure to your house) must be fastened with heavy-duty structural screws or through-bolts, and it must be meticulously flashed with metal and waterproof tape to prevent water from rotting your home’s rim joist.
-
Space Decking for Drainage: Ensure the surface boards are installed with adequate gapping. This allows rainwater to pass through easily, preventing puddles that lead to slipping hazards and premature wood rot.
-
Opt for Hidden Fasteners: If using premium composite materials, invest in a hidden fastener system. This eliminates visible screw heads on the surface, providing a clean, barefoot-friendly finish that won’t trap water.
Integrate Water Features with Existing Topography and Drainage
Adding a luxury water feature is the ultimate capstone to a backyard renovation, but it is also one of the most invasive and heavily regulated construction processes you can undertake. It requires massive earthmoving, complex soil retention, and specialized electrical and plumbing infrastructure that must be safely integrated into an outdoor environment.
You cannot simply dig a hole and drop in a liner. A certified pool contractor manages the massive logistical puzzle of this installation. They must navigate strict municipal setback rules to ensure the water feature is legally distanced from property lines and septic fields. Furthermore, they are responsible for analyzing your yard’s topography to ensure that the massive weight of the water does not cause slope failure, and that the excavation does not sever critical underground utility lines.
When incorporating luxury water features into your landscape, ensure these critical steps are managed:
-
Conduct Utility Sweeps: Before a single excavator track hits your grass, mandate a comprehensive underground utility sweep to mark buried gas, power, and sewer lines.
-
Plan for Hydrostatic Pressure: If you live in an area with a high water table, ensure hydrostatic relief valves are installed in the main drain. This prevents groundwater pressure from literally popping the empty shell out of the ground during maintenance.
-
Upgrade the Equipment Pad: Place the pumps, filters, and heaters on a solid, level concrete pad, and ensure they are wired to a dedicated subpanel with GFCI protection to guarantee absolute electrical safety around the water.

Phase 5: Maximizing Curb Appeal and Property Access
The final phase of a whole-home renovation is what the neighborhood actually sees. It focuses on the first impressions of the home, integrating the hard, functional surfaces of your property with the soft, organic elements of nature to tie the entire massive project together.
Pitch Surfaces Away From the Foundation to Manage Runoff
Your driveway and exterior walkways are not just places to park cars and walk to the front door; they are massive, impervious surfaces that collect and distribute thousands of gallons of rainwater. If these surfaces are poorly designed, they will act as a funnel, directing massive amounts of water directly into your newly renovated basement or crawlspace.
Hardscaping requires heavy machinery and a deep understanding of soil mechanics. Hiring a commercial-grade paving contractor ensures your new asphalt, stamped concrete, or interlocking paver surfaces can handle heavy vehicle weight without cracking, rutting, or settling unevenly over time. They will excavate the soft topsoil, lay a deep, compacted gravel base, and ensure the final surface is engineered for longevity.
To protect your property and ensure functional access, mandate these hardscaping standards:
-
Maintain a Proper Slope: Demand a minimum 2% slope on all hardscapes that touch the house. This guarantees that heavy rain is aggressively directed away from the foundation walls and toward the street or designated drainage swales.
-
Compact the Sub-Base: The longevity of a driveway relies entirely on the dirt beneath it. Ensure the sub-soil is thoroughly compacted and covered with a minimum of 4 to 6 inches of crushed angular gravel before any top surface is applied.
-
Install Channel Drains: If your driveway slopes downward toward your garage doors, you must install a heavy-duty, grate-covered channel drain spanning the entire width of the driveway to catch and reroute water before it breaches the garage threshold.
Select Native Plants to Reduce Long-Term Maintenance
The very last step of a renovation is grounding the newly constructed house into its surrounding environment. A dirt lot or a weed-filled yard instantly detracts from the hundreds of thousands of dollars you have just spent on the architecture. However, throwing random plants into the ground without a cohesive plan usually results in high water bills, dead foliage, and endless weekend maintenance.
Softscaping is both an art and an agricultural science. Professional landscaping contractors can design a comprehensive, phased plan that perfectly complements the architectural style of your home. They will test the pH of your soil, understand the micro-climates of your yard (shady corners vs. full-sun exposures), and install irrigation systems that protect your vegetative investment without wasting municipal water.
To maximize your curb appeal while minimizing your weekend chores, adopt these planting strategies:
-
Prioritize Native Species: Choose plants, shrubs, and trees that are native to your specific geographic region. They have evolved to thrive in your local soil and rainfall conditions, requiring drastically less fertilizer and supplemental watering.
-
Practice Hydrozoning: Group plants by their specific watering needs. Do not plant a water-heavy fern next to a drought-tolerant ornamental grass, as one will inevitably die from either over-watering or under-watering.
-
Amend the Soil deeply: Do not just dig a hole and drop the plant in. Amend the surrounding soil with rich organic compost to promote deep, robust root growth that helps plants survive harsh summer droughts.
-
Incorporate Low-Voltage Lighting: Extend the visual impact of your home into the evening by installing warm, low-voltage LED uplighting on specimen trees and soft path lighting along the walkways to enhance both security and aesthetics.
Conclusion
A complete home renovation is not a single, isolated event; it is a highly choreographed, multi-phased operation. Taking a house down to its studs and rebuilding it for the modern era relies entirely on assembling the right team of specialized experts and allowing them to execute their trades in the correct, logical sequence. From the overarching project manager who pulls the initial permits to the specialists who wire the final landscape lighting, every professional plays a critical role in the integrity of the final product.
The most vital advice any homeowner can heed is to never rush the vetting process. The excitement of starting a project often causes people to hire the first person who returns their phone call or offers the lowest bid. This is a recipe for disaster. Take the time to diligently check references, demand proof of active liability insurance, read through contracts line by line, and physically visit past job sites to see the quality of their work with your own eyes before handing over a deposit.
Now that you understand the sequence of construction and exactly who needs to be involved, it is time to take the next step. Finalize your overarching budget, begin reaching out to local professionals for preliminary bids, and start drafting the master timeline for your home’s incredible transformation.
Embarking on a whole-home renovation is both thrilling and intensely overwhelming. It is an incredible opportunity to take an aging, outdated property and completely transform it into a highly personalized sanctuary that perfectly aligns with your aesthetic tastes and daily functional needs. There is a profound sense of satisfaction in tearing down restrictive walls, reimagining cramped floor plans, and watching a dilapidated space breathe new life. However, beneath the glossy “after” photos seen in magazines and television shows lies a reality of dust, delays, and critical decision-making.
The sheer volume of moving parts in a complete home renovation is staggering. You are not just painting walls; you are tearing down load-bearing structures, rerouting complex electrical grids, upgrading plumbing lines, and exposing the very bones of the house to the elements. This complexity means that hiring the wrong people—or executing tasks entirely out of order—can rapidly turn a dream project into a stressful, budget-draining nightmare.
This guide is designed to cut through the confusion of the construction industry by breaking down exactly who you need to hire and at what specific stage of the process they should be brought in. A successful renovation relies entirely on sequence and specialization. By strategically assembling a team of highly vetted experts and managing the sequence of their work, you can ensure your complete home renovation is executed safely, on budget, and to the absolute highest quality standards.
Phase 1: Structuring the Project and Securing the Envelope
The initial phase of a whole-home renovation rarely involves the glamorous selections of tile or cabinetry. Instead, it is rooted in establishing a solid management framework and ensuring the physical structure of your house is protected from the elements. If you fail to secure the envelope, every dollar you spend on the interior is at risk.
Appoint a Central Point of Contact to Manage the Chaos
Taking on a whole-house renovation as a DIY project manager is a monumental risk unless you have decades of construction industry experience. You will be dealing with municipal zoning boards, inspectors, material suppliers, and dozens of different tradespeople. Managing these schedules while ensuring that the framing does not interfere with the HVAC ductwork, or that the plumbing is laid before the subfloor goes down, requires a master conductor.
For a project of this scale, bringing in experienced general contractors is absolutely essential. These professionals are the umbrella management over your entire site. They are responsible for pulling the overarching building permits, scheduling the specialized trades in the correct and most efficient sequence, and holding the line on your budget. They also carry the necessary massive liability and worker’s compensation insurance policies that protect you, the homeowner, from devastating lawsuits if someone is injured on your property.
When vetting the person or team who will run your site, consider the following actionable steps:
-
Verify Subcontractor Networks: Ask about the tradespeople they employ. A great project manager is only as good as the plumbers, electricians, and framers they bring to the job.
-
Understand the Contract Structure: Determine if you are signing a “Fixed Price” contract (which protects you from budget overruns but limits flexibility) or a “Cost Plus” contract (which offers flexibility but requires strict auditing of receipts).
-
Establish Communication Protocols: Demand a weekly site walk-through and a transparent digital dashboard where you can see schedule updates, daily logs, and budget tracking.
-
Check the License Validity: Never assume a license is current. Look up their license number on your state’s contractor board website to check for formal complaints or lapsed bonding.
Prioritize Weatherproofing Before Touching the Interior
It is a common mistake for eager homeowners to start tearing out their kitchens or bathrooms on day one. However, if the roof above those newly renovated spaces is failing, one heavy rainstorm can destroy thousands of dollars worth of fresh drywall, custom cabinetry, and hardwood flooring. The absolute first physical step in a full home renovation is securing the building envelope.
You must assess the structural integrity of the top of your house before any interior walls are opened. Finding a reputable local roofing contractor to evaluate your property is critical. They understand the specific weather challenges of your region—whether that involves high-velocity hurricane winds, heavy snow loads, or blistering sun—and can recommend the appropriate underlayments and shingle ratings. Securing the envelope means that the rest of the renovation can proceed without the looming threat of water intrusion.
To ensure your weatherproofing is handled correctly, adhere to these guidelines:
-
Demand a Full Tear-Off: Never allow new shingles to be layered over old ones. A full tear-off is the only way to inspect the underlying wood decking for hidden water damage, mold, and rot.
-
Upgrade the Underlayment: Ask for a synthetic, tear-resistant underlayment rather than traditional felt paper, as it provides a far superior barrier against moisture.
-
Install Ice and Water Shields: Ensure that an ice and water barrier is applied to the eaves, valleys, and around all penetrations (like chimneys and vent pipes) to prevent leaks during freeze-thaw cycles.
Phase 2: Overhauling High-Value Interior Spaces
With the project management secured and the exterior envelope locked down, the renovation moves into the most complex, expensive, and valuable rooms in the house: the kitchen and the bathrooms. These spaces require an intense convergence of plumbing, electrical, and custom carpentry.
Optimize Your Cooking Layout for Workflow and Storage
The kitchen is the heart of the home, but it is also a highly technical workspace. A poorly designed kitchen will frustrate you daily, regardless of how beautiful the finishes are. When completely gutting a kitchen, you are not just replacing cabinets; you are likely moving walls to create open-concept living, running new gas lines for professional-grade ranges, and upgrading the electrical panel to handle modern appliances.
Because the tolerances in a kitchen are incredibly tight—appliances must fit exactly, countertops must be perfectly level, and plumbing rough-ins must align precisely with sink bases—you need specialized oversight. Hiring a dedicated kitchen remodeling contractor ensures that the architectural design translates flawlessly into physical reality. These experts know how to optimize cabinet layouts for maximum storage, maneuver around load-bearing constraints, and coordinate the precise timing required between cabinet installation, countertop templating, and final plumbing hookups.
To maximize the functionality and value of your new cooking space, keep these tips in mind:
-
Implement the Work Triangle: Ensure the path between your stove, sink, and refrigerator is unobstructed and forms an efficient triangle to minimize unnecessary steps while cooking.
-
Plan for Heavy Electrical Loads: Modern kitchens require dedicated circuits for the refrigerator, microwave, dishwasher, and garbage disposal, plus multiple 20-amp circuits for countertop appliances.
-
Maximize Lower Storage: Opt for deep drawers instead of traditional lower cabinets with doors. Drawers allow you to see and access all your pots and pans without kneeling and digging through dark shelves.
-
Focus on Task Lighting: Do not rely solely on recessed ceiling cans. Incorporate under-cabinet LED lighting to illuminate your countertops and eliminate shadows over your prep areas.
Upgrade Plumbing Behind the Walls to Prevent Future Leaks
Bathrooms are essentially indoor water management systems. They are subjected to daily deluges of water, high humidity, and extreme temperature fluctuations. If the systems behind the drywall and beneath the tile fail, the resulting water damage can quietly rot the structural joists of your home over several years before you even notice a problem.
When you have stripped a bathroom down to the studs, it is the perfect time to upgrade outdated plumbing. Old galvanized steel pipes will eventually corrode and restrict water pressure, while polybutylene pipes are notorious for sudden, catastrophic ruptures. Bringing in seasoned bathroom contractors is the best way to ensure that the hidden infrastructure is modernized and that the wet areas are built with bulletproof waterproofing technology. They will handle the complex slope of custom shower pans and the installation of vapor barriers that keep mold completely out of your wall cavities.
Before closing up the walls in your new bathrooms, mandate the following steps:
-
Replace Old Supply Lines: Upgrade all hidden water supply lines to modern PEX or rigid copper to future-proof the home against leaks and ensure strong, consistent water pressure.
-
Utilize Modern Waterproofing Membranes: Do not rely on traditional drywall or cement board alone in wet areas. Insist on topical waterproofing systems (like Schluter-Kerdi or RedGard) painted or applied directly over the backer board before any tile is laid.
-
Upgrade the Ventilation: Proper exhaust fans are non-negotiable. Ensure the fan is properly sized for the room’s square footage and is vented entirely to the outside of the roof—never directly into the attic, which will cause massive mold growth.
Phase 3: Upgrading Core Systems and Finalizing the Capstone
As the interior framing and rough-ins are completed, the focus shifts to the invisible systems that dictate the daily comfort of your home, as well as the meticulous execution of the home’s exterior capstone.
Size Your Climate Systems Properly to Avoid Energy Waste
A beautiful home is unlivable if it is freezing in the winter, stifling in the summer, or plagued by poor indoor air quality. During a complete renovation, especially if you have added square footage or removed walls, your existing climate control systems are likely obsolete. You cannot simply attach new ductwork to an old furnace and expect adequate performance.
Climate control is a highly regulated science. You need a licensed heating and air conditioning contractor to evaluate the new thermal envelope of your home. They will run complex calculations to determine the exact amount of heating and cooling your specific layout requires. Oversizing a system will cause it to short-cycle, leaving the house incredibly humid, while undersizing it will cause the equipment to run continuously, driving up your energy bills and wearing out the machinery prematurely.
To guarantee year-round comfort and energy efficiency, focus on these critical HVAC elements:
-
Demand a Manual J Calculation: Never let a professional guess the size of the equipment based on a “rule of thumb” square footage estimate. A Manual J calculation factors in the direction your windows face, the quality of your insulation, and your local climate.
-
Seal the Ductwork: Leaky ducts can lose up to 30% of their conditioned air into uninsulated crawlspaces or attics. Ensure all new and accessible old ductwork is sealed with mastic sealant, not standard duct tape.
-
Consider High-Efficiency Heat Pumps: If you are overhauling the system, look into modern variable-speed heat pumps. They are incredibly energy-efficient and can handle both the heating and cooling loads for the home, often eliminating the need for fossil fuels.
-
Establish Zoned Climate Control: Instead of relying on one thermostat to dictate the temperature of the entire house, install a zoned system with electronic dampers to independently control the climate in the bedrooms versus the main living areas.
Verify Flashing and Ventilation Standards During Top-Level Upgrades
While the earlier phase addressed the structural necessity of securing the roof deck and underlayment, the actual installation of the top-level materials requires exceptional attention to detail. The shingles, metal panels, or tiles are your home’s primary armor against the sky, but the system is only as strong as its weakest seam.
The majority of roof leaks do not occur in the middle of a field of shingles; they occur at the penetrations and the edges. Communicating closely with skilled roof installers during the physical application phase guarantees that critical details are executed flawlessly. If flashing is installed backward or ventilation is choked off, it can void the manufacturer’s warranty on the materials, leaving you financially responsible for the inevitable repairs.
To ensure the top of your home performs perfectly for decades, verify these installation standards:
-
Inspect the Step Flashing: Anywhere the roof intersects with a vertical wall (like a dormer or a chimney), individual pieces of L-shaped metal step flashing must be woven into each course of shingles to aggressively direct water away from the wall.
-
Ensure Unblocked Soffits: The intake vents under your eaves (soffits) must remain clear. Make sure interior insulation baffles are installed so that attic insulation does not spill over and block the airflow.
-
Balance Intake and Exhaust: A roof needs to breathe to prevent shingle-baking heat in the summer and condensation-driven rot in the winter. Ensure the net free area of your ridge vents matches the capacity of your soffit vents to create a continuous, passive draft of air under the roof deck.
Phase 4: Expanding the Footprint with Outdoor Living Spaces
With the interior of the home reaching its final stages of finishing, a true complete renovation extends past the back door. Expanding the livable square footage into the backyard fundamentally changes how you interact with your property, turning basic yards into high-end entertainment zones.
Anchor Exterior Structures to Frost-Depth Footings
Outdoor carpentry faces a completely different set of challenges than interior framing. A backyard entertaining space is constantly subjected to UV radiation, torrential rain, and extreme weight loads from outdoor kitchens, hot tubs, and large gatherings of people. Furthermore, if an outdoor structure is attached directly to your home, any structural failure outside can rip the siding and framing off your house.
Building a safe, code-compliant outdoor living area is not a weekend DIY job. Hiring experienced deck contractors is necessary to navigate the strict municipal codes regarding outdoor structures. They understand the heavy-duty fastening systems required to build a frame that will not sway or collapse, and they can guide you through the overwhelming myriad of material choices, from traditional pressure-treated lumber to ultra-low-maintenance PVC and composites.
To ensure your outdoor structure is safe and enduring, insist on the following structural protocols:
-
Dig Below the Frost Line: All concrete footings supporting the posts must be poured below your region’s specific frost line. If they are too shallow, the freezing and expanding ground will heave the posts upward, destroying the structure.
-
Use Proper Ledger Board Fasteners: The ledger board (the piece of wood attaching the structure to your house) must be fastened with heavy-duty structural screws or through-bolts, and it must be meticulously flashed with metal and waterproof tape to prevent water from rotting your home’s rim joist.
-
Space Decking for Drainage: Ensure the surface boards are installed with adequate gapping. This allows rainwater to pass through easily, preventing puddles that lead to slipping hazards and premature wood rot.
-
Opt for Hidden Fasteners: If using premium composite materials, invest in a hidden fastener system. This eliminates visible screw heads on the surface, providing a clean, barefoot-friendly finish that won’t trap water.
Integrate Water Features with Existing Topography and Drainage
Adding a luxury water feature is the ultimate capstone to a backyard renovation, but it is also one of the most invasive and heavily regulated construction processes you can undertake. It requires massive earthmoving, complex soil retention, and specialized electrical and plumbing infrastructure that must be safely integrated into an outdoor environment.
You cannot simply dig a hole and drop in a liner. A certified pool contractor manages the massive logistical puzzle of this installation. They must navigate strict municipal setback rules to ensure the water feature is legally distanced from property lines and septic fields. Furthermore, they are responsible for analyzing your yard’s topography to ensure that the massive weight of the water does not cause slope failure, and that the excavation does not sever critical underground utility lines.
When incorporating luxury water features into your landscape, ensure these critical steps are managed:
-
Conduct Utility Sweeps: Before a single excavator track hits your grass, mandate a comprehensive underground utility sweep to mark buried gas, power, and sewer lines.
-
Plan for Hydrostatic Pressure: If you live in an area with a high water table, ensure hydrostatic relief valves are installed in the main drain. This prevents groundwater pressure from literally popping the empty shell out of the ground during maintenance.
-
Upgrade the Equipment Pad: Place the pumps, filters, and heaters on a solid, level concrete pad, and ensure they are wired to a dedicated subpanel with GFCI protection to guarantee absolute electrical safety around the water.
Phase 5: Maximizing Curb Appeal and Property Access
The final phase of a whole-home renovation is what the neighborhood actually sees. It focuses on the first impressions of the home, integrating the hard, functional surfaces of your property with the soft, organic elements of nature to tie the entire massive project together.
Pitch Surfaces Away From the Foundation to Manage Runoff
Your driveway and exterior walkways are not just places to park cars and walk to the front door; they are massive, impervious surfaces that collect and distribute thousands of gallons of rainwater. If these surfaces are poorly designed, they will act as a funnel, directing massive amounts of water directly into your newly renovated basement or crawlspace.
Hardscaping requires heavy machinery and a deep understanding of soil mechanics. Hiring a commercial-grade paving contractor ensures your new asphalt, stamped concrete, or interlocking paver surfaces can handle heavy vehicle weight without cracking, rutting, or settling unevenly over time. They will excavate the soft topsoil, lay a deep, compacted gravel base, and ensure the final surface is engineered for longevity.
To protect your property and ensure functional access, mandate these hardscaping standards:
-
Maintain a Proper Slope: Demand a minimum 2% slope on all hardscapes that touch the house. This guarantees that heavy rain is aggressively directed away from the foundation walls and toward the street or designated drainage swales.
-
Compact the Sub-Base: The longevity of a driveway relies entirely on the dirt beneath it. Ensure the sub-soil is thoroughly compacted and covered with a minimum of 4 to 6 inches of crushed angular gravel before any top surface is applied.
-
Install Channel Drains: If your driveway slopes downward toward your garage doors, you must install a heavy-duty, grate-covered channel drain spanning the entire width of the driveway to catch and reroute water before it breaches the garage threshold.
Select Native Plants to Reduce Long-Term Maintenance
The very last step of a renovation is grounding the newly constructed house into its surrounding environment. A dirt lot or a weed-filled yard instantly detracts from the hundreds of thousands of dollars you have just spent on the architecture. However, throwing random plants into the ground without a cohesive plan usually results in high water bills, dead foliage, and endless weekend maintenance.
Softscaping is both an art and an agricultural science. Professional landscaping contractors can design a comprehensive, phased plan that perfectly complements the architectural style of your home. They will test the pH of your soil, understand the micro-climates of your yard (shady corners vs. full-sun exposures), and install irrigation systems that protect your vegetative investment without wasting municipal water.
To maximize your curb appeal while minimizing your weekend chores, adopt these planting strategies:
-
Prioritize Native Species: Choose plants, shrubs, and trees that are native to your specific geographic region. They have evolved to thrive in your local soil and rainfall conditions, requiring drastically less fertilizer and supplemental watering.
-
Practice Hydrozoning: Group plants by their specific watering needs. Do not plant a water-heavy fern next to a drought-tolerant ornamental grass, as one will inevitably die from either over-watering or under-watering.
-
Amend the Soil deeply: Do not just dig a hole and drop the plant in. Amend the surrounding soil with rich organic compost to promote deep, robust root growth that helps plants survive harsh summer droughts.
-
Incorporate Low-Voltage Lighting: Extend the visual impact of your home into the evening by installing warm, low-voltage LED uplighting on specimen trees and soft path lighting along the walkways to enhance both security and aesthetics.
Conclusion
A complete home renovation is not a single, isolated event; it is a highly choreographed, multi-phased operation. Taking a house down to its studs and rebuilding it for the modern era relies entirely on assembling the right team of specialized experts and allowing them to execute their trades in the correct, logical sequence. From the overarching project manager who pulls the initial permits to the specialists who wire the final landscape lighting, every professional plays a critical role in the integrity of the final product.
The most vital advice any homeowner can heed is to never rush the vetting process. The excitement of starting a project often causes people to hire the first person who returns their phone call or offers the lowest bid. This is a recipe for disaster. Take the time to diligently check references, demand proof of active liability insurance, read through contracts line by line, and physically visit past job sites to see the quality of their work with your own eyes before handing over a deposit.
Now that you understand the sequence of construction and exactly who needs to be involved, it is time to take the next step. Finalize your overarching budget, begin reaching out to local professionals for preliminary bids, and start drafting the master timeline for your home’s incredible transformation.